So you’re ready to track down those lost sales, huh? Good. Abandoned cart email automation sounds scary and complicated, but it’s honestly really straightforward. In this quick blog post I’ll walk you through exactly how to set it up in your MailChimp account and even give some recommendations for a good place to start. But first, let’s go over the basics!
What is abandoned cart email automation?
What do I mean exactly when I say “Abandoned Cart Email Automation.” Email Automation refers to a series of emails that will be automatically sent to your recipient based upon certain criteria. In this case, that criteria is leaving something in their cart on your website without completing the checkout process.
Email automation can and should be used for a lot more than just this single series. I might write some posts on those in the future as well. Let me know on Facebook if you’d like that!
Why Do Businesses Want Abandoned Cart Email Automation?
To put it simply, you’ll sell more products. A lot more. MailChimp’s data says 34 times more orders per recipient. In my experience, I haven’t seen numbers quite that high, but I have grown a business from about 500k to 3M in the course of a couple of years largely on the back of abandoned cart email automation.
Tike’s Toys, A Case Study
At the time of writing, you’ll need the “Essentials” plan, which starts at $11 per month. The price goes up based on how many contacts are on your email list. Let’s take a quick moment to talk about this pricing though by using a real-world example.
We’re going to call this business Tike’s Toys. When I approached Tike with the cost of this upgraded MailChimp account he was at first a little skeptical. You see he had about 1,000 people on his mailing list, which means he could still qualify for the free service at MailChimp.
Going from $0 per month to $23 per month was a pretty big pill to swallow for the small business owner. Tike trusted me and the data though and we took the chance with upgrading that MailChimp account.
Our first campaign with the new features brought in over $800 in trackable revenue. The abandoned cart email did an additional $500 in the first month and our lapsed customers did another $500. All together we brought in nearly $2000 in trackable revenue in the first month of our MailChimp Essentials plan.
Today, Tike’s mailing list is closer to 10,000 subscribers and we pay $115 a month for that subscription. Every month, however, we expect at least $3,000 in trackable revenue from these email campaigns. And our lapsed subscribers campaigns, abandoned cart campaigns, and thank you campaigns have generated a little over $10,000 in the last two years with that fairly small email list.
So in short, how much does it cost? If you have a mailing list of people that want your product, it costs significantly more not to do this
Step 1. Create a MailChimp Account
To get this setup, we’re going to need a MailChimp account. This can be done on other email platforms as well, but for the purposes of this blog post, we’ll be using MailChimp. MailChimp is easy to set up and very affordably priced.
Simply go to MailChimp and click “Sign Up Free” on the top right. From here there’s a form that will get you set up with your initial account. You’ll need your business information like Name, Address, etc to complete this setup.
Step 2. Connect your eCommerce store.
Step 2 is to connect your store. MailChimp supports Shopify, WooCommerce, Magento, Lightspeed, PrestaShop, BigCommerce, Big Cartel, Drupal, Miva, Eventbrite, Volusion, and custom integrations for any stack with a 3.0 API from MailChimp.
For the purposes of this article, I’m just going to go over WooCommerce. However, I’ve linked each of the knowledge base articles from MailChimp above.
Connecting WooCommerce
- Download the plugin.
- Install the plugin on your WordPress Admin site.
- Connect the plugin with your Mailchimp account.
- Configure your settings to complete the data sync process.
You’ll start with installing the MailChimp for WooCommerce plugin. You should be able to find this on the WordPress Plugin Directory page in your dashboard, but if you’re not here is the direct link so you can download it accordingly.
Once the plugin is installed, you need to connect and configure the plugin. The plugin makes this super easy. In your WordPress dashboard, click on WooCommerce > MailChimp. Then you’ll just follow the on-screen wizard of logging into the account, authorizing the connection, and filling out some business information.
The last step of the wizard is to start an audience sync. This will bring over your Users from WooCommerce and import them into MailChimp. If you ever need to resync for any reason, you can do that from this same plugin without losing any eCommerce data.
Step 3. Create The Journey
In MailChimp, these abandoned cart email automation series are called Journeys. You can access and create a new journey by logging into MailChimp and clicking on “Customer Journeys” under Automations.
From here, you should see a “Start From Scratch” option as well as a some prefab journeys and a Browse All button. Click on Browse All.
Now you should see a large list of Journeys to use and get those creative marketing juices flowing.
For this, I’m going to simply recommend the “Recover Abandoned Carts” customer journey. Click on that.
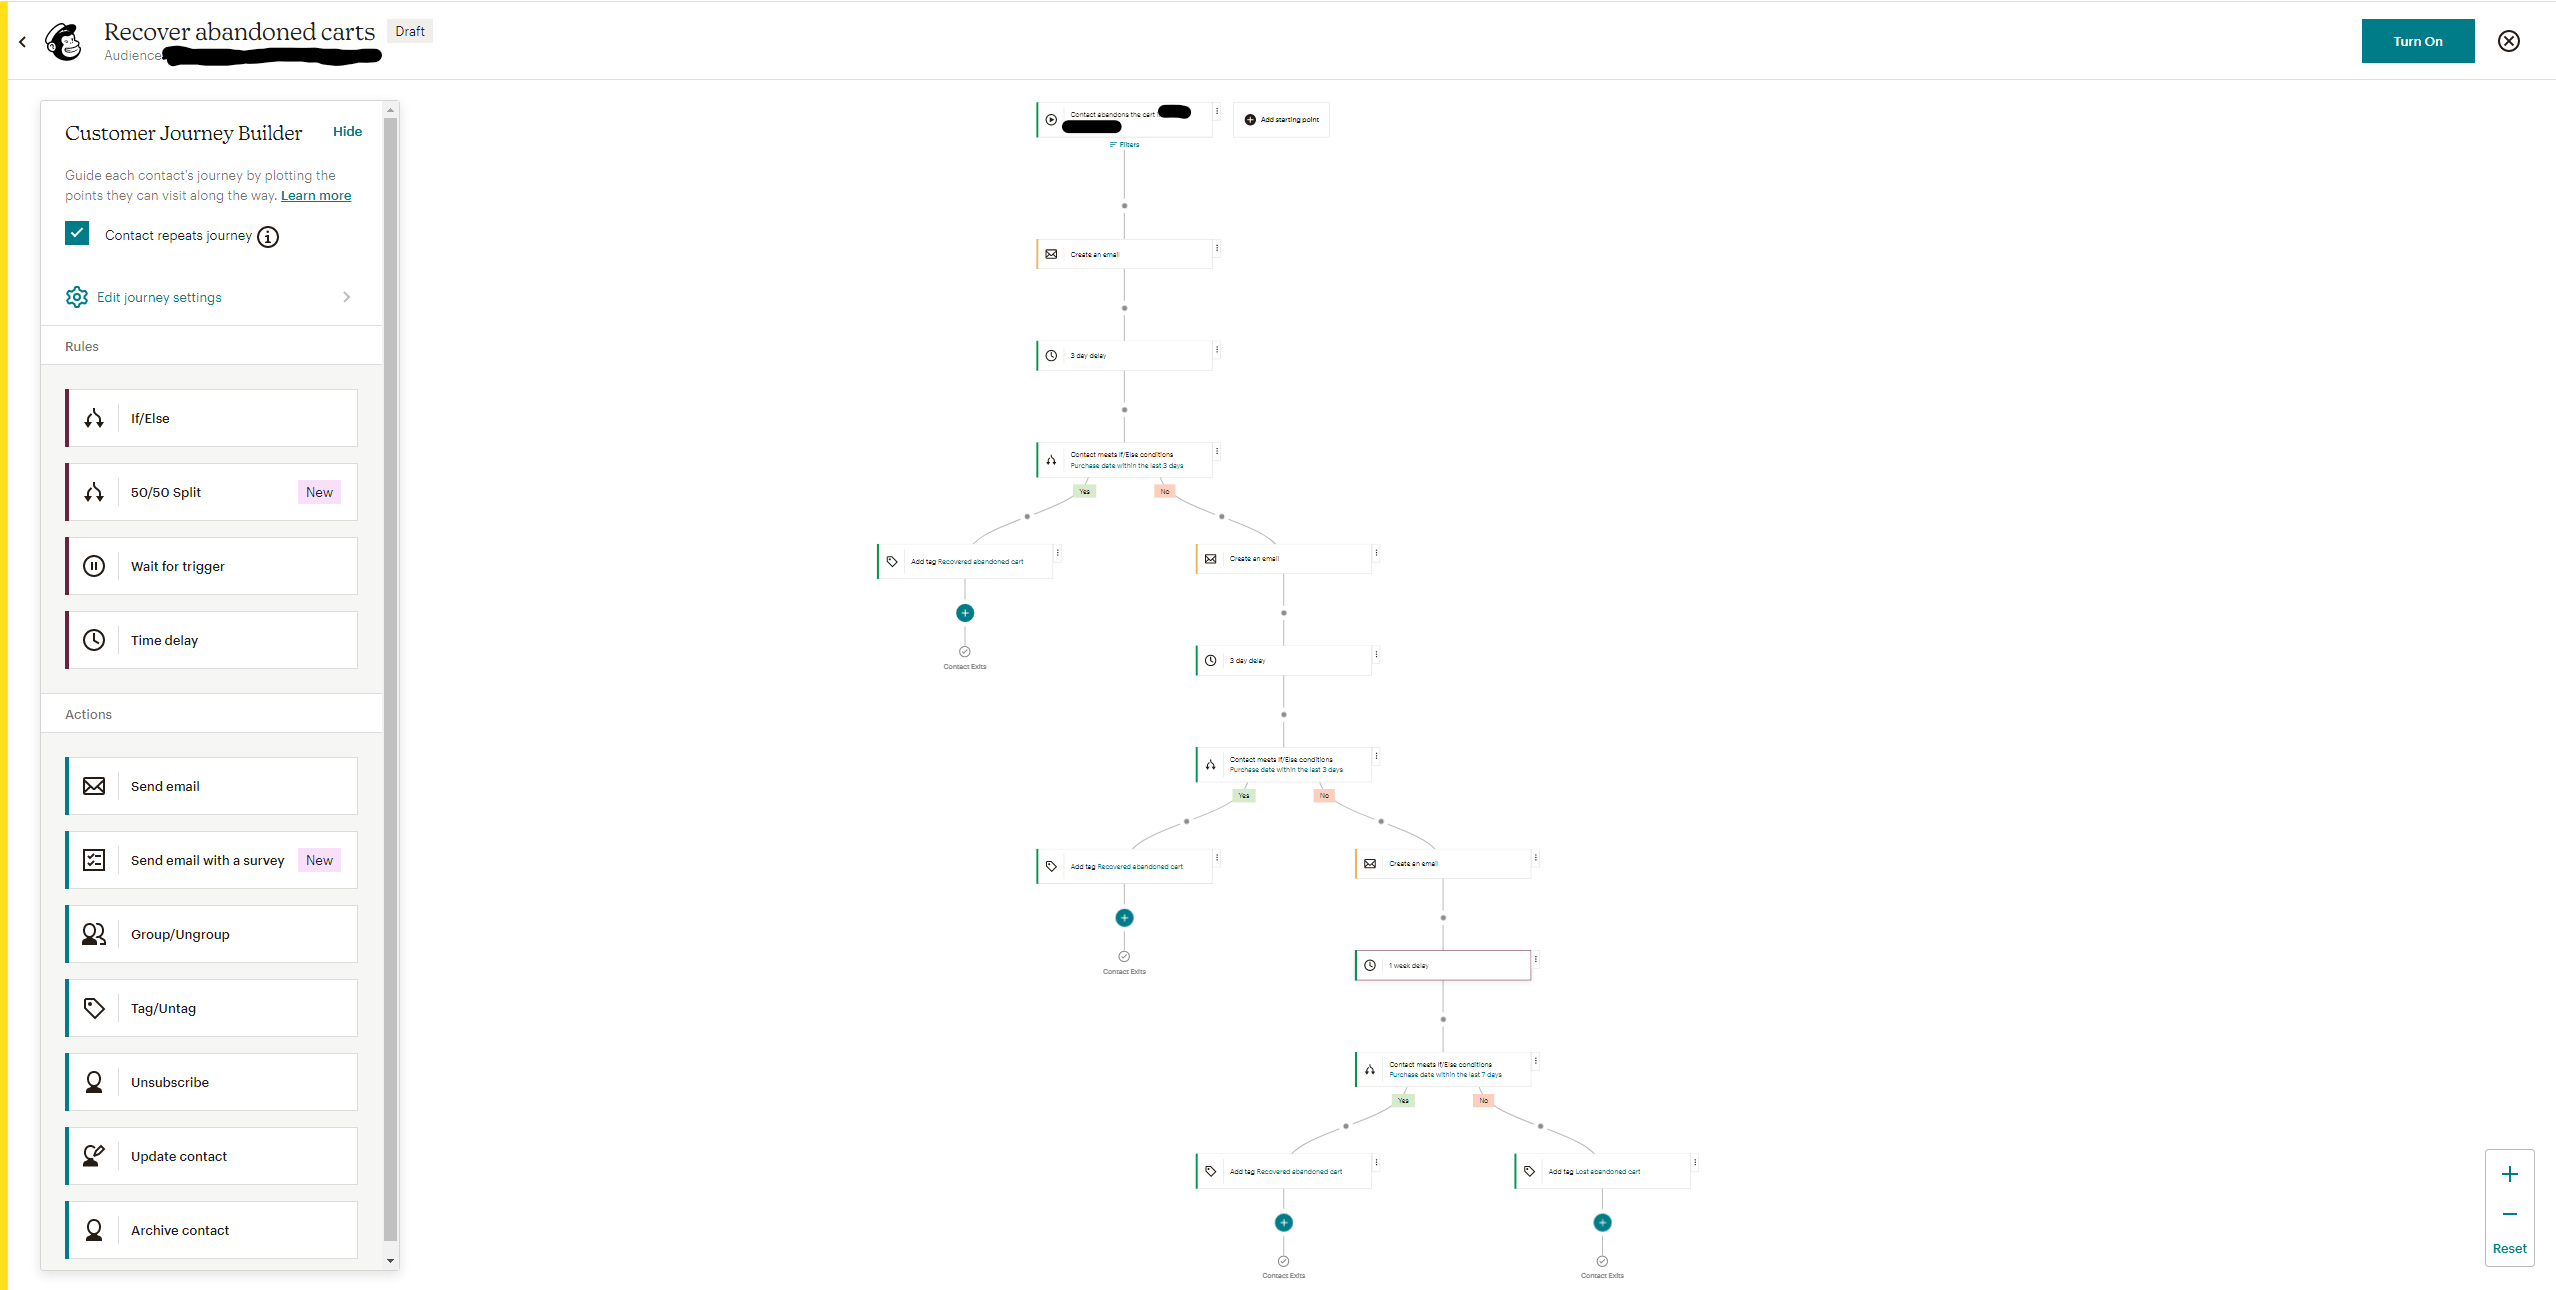
This should take you to another page that tells you the details of this journey. It will send an email when a cart is abandoned as well as 2 follow up emails at 3 days and 6 days after that abandonment. It will then tag the customer if they don’t purchase anything within a week after that last email.
On the top right of your screen you should see “Build Journey.” Click on that and choose your account and list.
On the next screen you should see the whole journey! From here you can adjust the quantity of emails, tags, or anything really in the logic channels. MailChimp’s Journey Builder is pretty great.
Don’t click “Turn On” yet though! We need to design that email.
Step 4. Add your brand’s secret sauce.
On that Journey Tree, you should see a “Create An Email” task. Click on that.
From here, you can adjust the subject line and email template. We won’t go into great detail on how to create an email template here, but by using MailChimp’s builder you can create some very creative and effective templates.
Once you’ve gone through this template choosing process, click “Save and return to journey” on the top right.
There are TWO emails in this Customer Journey template. Be sure to edit each accordingly and definitely don’t make them just identical emails.
Step 5. Profit!
Now that you’ve created your Customer Journey, checked all the settings in that journey, double-checked your email subject lines and content, and are happy with what you’re about to automate, we’re ready to turn this money-generating machine on!
On the top right of your screen, you’ll see a “Turn On” button. You can click this now. You’ll get a success message and high fives all around.
And that’s it!
Congratulations, you’ve just taken your first steps in generating a lot more revenue each month. If you were using MailChimp in the past for an eCommerce website but didn’t have this set up you likely just paid for your entire MailChimp subscription for the year with this one simple trick.
I hope this article was helpful! If it was, please feel free to head over to our Facebook page and give us a thumbs up.
If all of this seems like way too much time for your busy schedule, hire us to do it for you! We love working with eCommerce businesses and watching them grow using tools like this and others. We have a number of retainer options that will have us take care of all your MailChimp campaigns and all we need from you is maybe an hour a month to discuss what we’re doing. Please feel free to reach out below if you’d like to talk more about that!