How To Migrate To New Hosting
This post may contain affiliate links, which means I may receive a commission if you click a link and purchase something that I have recommended. Thank you!
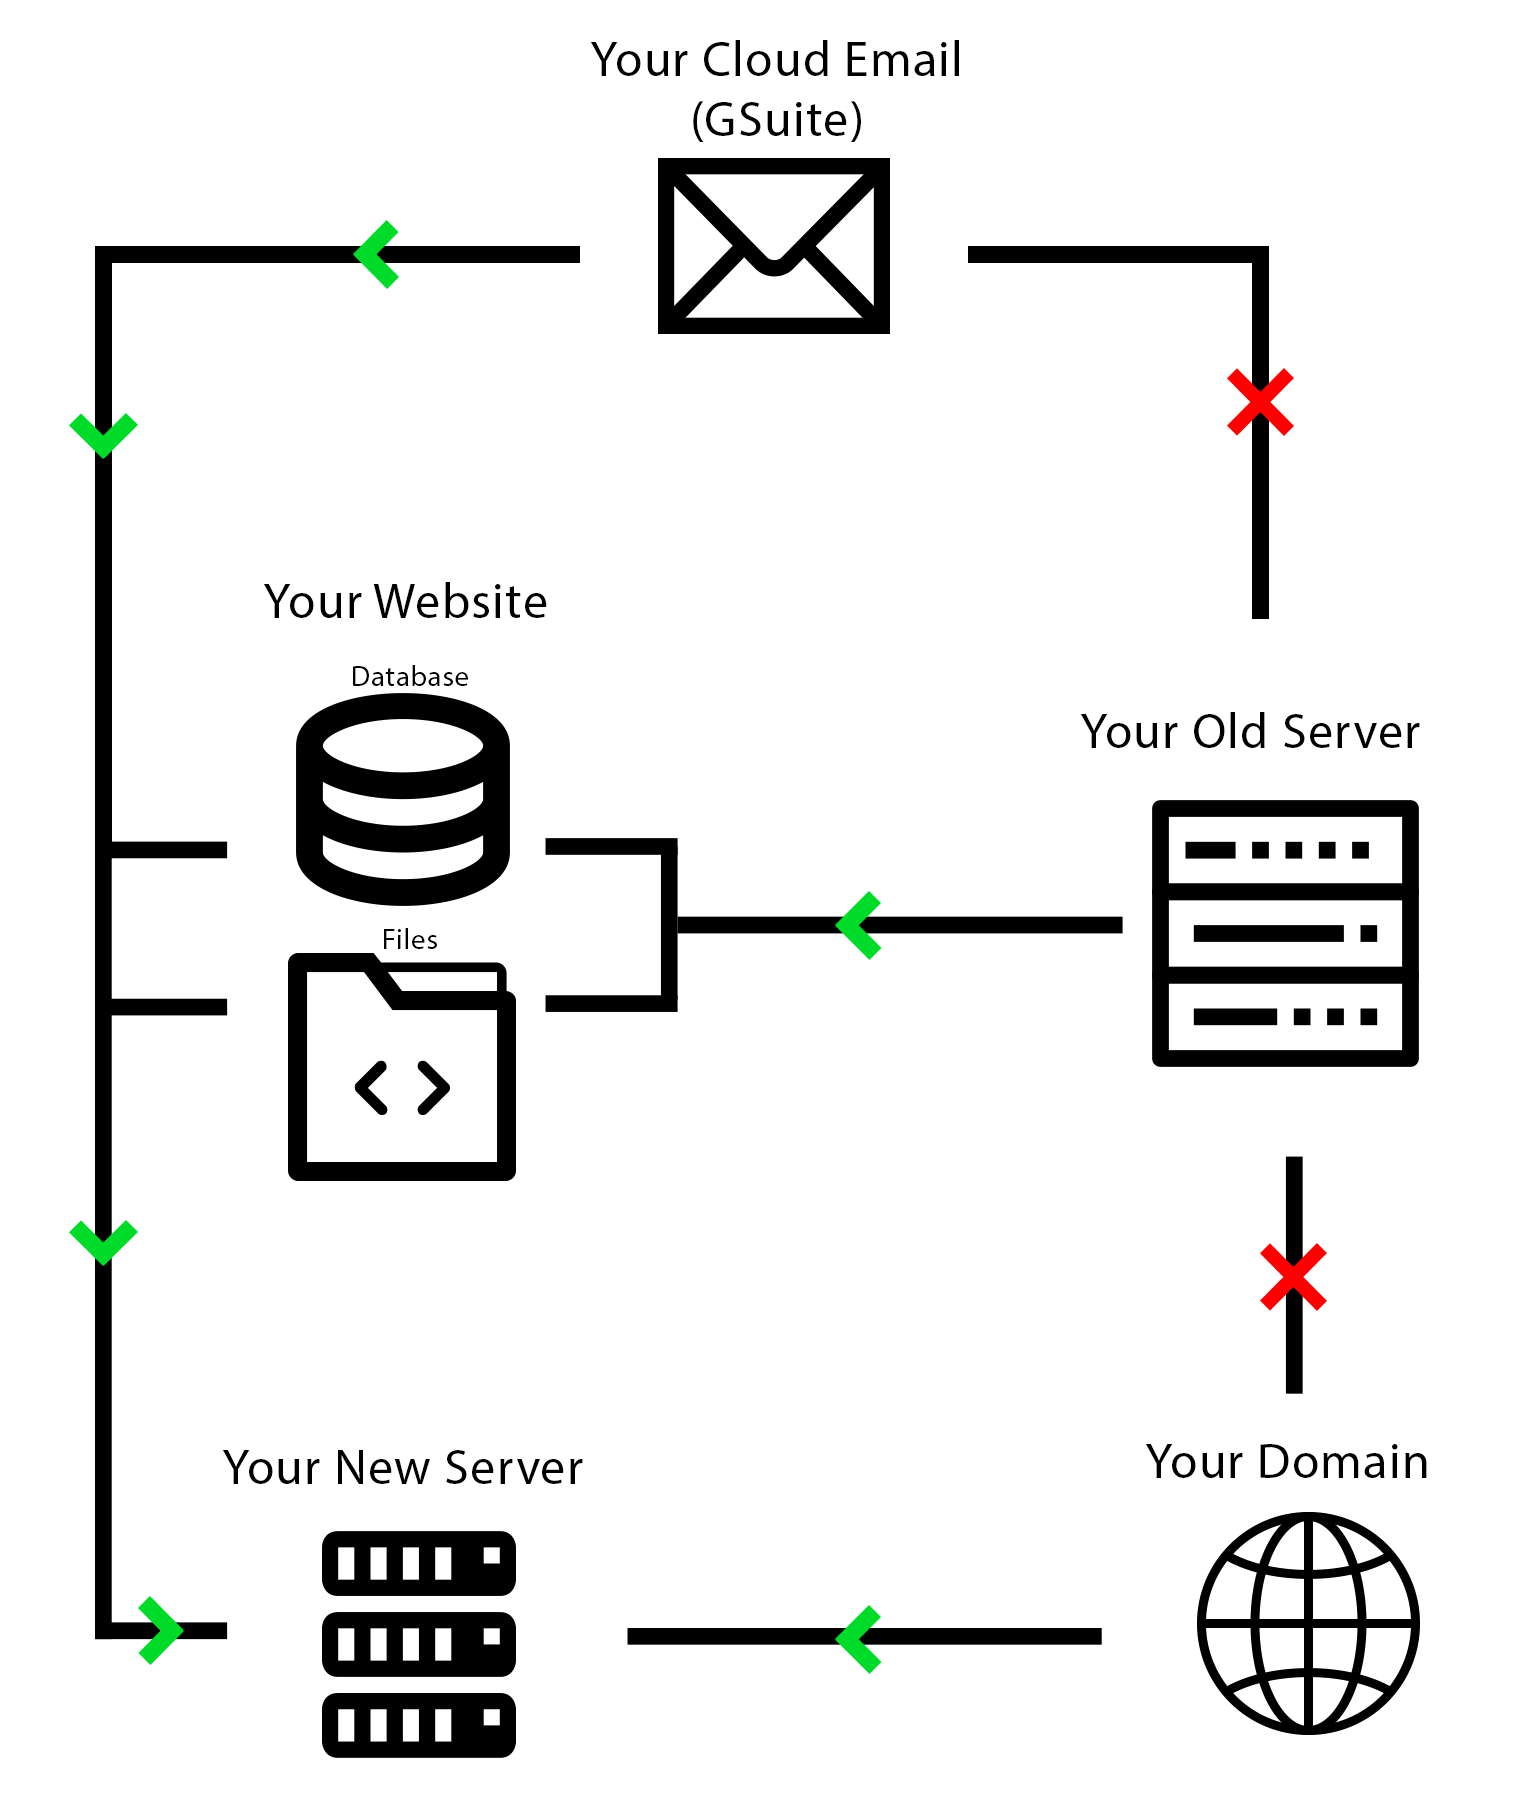
Moving hosting can be a very intimidating prospect. And doing it with absolutely no downtime is a terrifying necessity. This guide aims to walk through the process step by step and hopefully should make the whole process seem a bit easier. Remember, if you ever need Zealous Sites to do this, or something similar, for you we are happy to assist!
Step 0.
Choose New Hosting
When deciding if you need to move hosting, first weigh your options. There are a lot of hosting providers out there and choosing the cheapest one will more than likely get you in a heap of trouble (again) down the road. Our recommendation is to choose the one that fits your business best. At the time of writing, those will likely be either:
- SiteGround (Just Great All-Around Hosting)
- ManageWP (Great For Premium Websites with LOTS of Traffic)
- Atlantic Hosting (The only reliable WordPress HIPAA Compliant Option I’m Aware Of)
For more on this, see our blog post here.
Step 1.
Buy New Hosting
When migrating hosts, the very first thing that needs to be done is for your new host to be purchased and set up. You’ll need this so that we have a place to put the files and database in the next steps.
Step 2.
Buy Google Suite
When you move hosts, you’ll also need to move your email accounts. Because of this, it’s a perfect time to upgrade your email to the Google Suite. I recommend the Google Suite because it’s the solution we use here at Zealous Sites and we absolutely love it.
Having your email powered by Google just gives you the peace of mind you’re looking for when dealing with email. You won’t have to worry about it not being there in a few months, or attachment sizes being too large. With the Google Suite, you’ll get access to the Google Drive as well as many other business tools that will make your life way easier. Check out this blog post for more information on that as well as a coupon for 20% off the first year.
If you’d prefer to keep webmail, you will still need to re-create each email in the new hosting platform and then update the credentials wherever those emails are used.
Step 3.
Update Your MX Records
If you bought the Google Suite, part of the set up will be updating your domain’s MX Records. I recommend doing this while your website is hosted on your old hosting account first. This way your email will have no downtime during the move.
Step 4.
Export Your WordPress Website
Now it’s time to actually start moving the website files. If you have a WordPress website (which let’s be honest… you probably do… and for good reason!), then you will need to export both the Database and the files.
If you’re moving to SiteGround, this whole step is replaced by installing a plugin and running their migration tool.
Step 5.
Import Website To New Server
Now that you have your database (probably an .SQL file) and your files (probably a .zip) you will need to import those into your new hosting server.
The files are easy. You’ll just upload the zip to the server and extract them.
The database is not. You’ll need to make sure you created a database, then import the SQL file into that database. Then take the new credentials you created for that database and update your wp-config.php file (which should be in your root folder where you just placed your files).
If all this sounds complicated and/or difficult… it kind of is. But this whole step is also circumvented by using SiteGround’s migration tool.
Step 6.
Test The New Server
Testing your website at the new server location can be tricky because your domain isn’t pointed there yet and WordPress requires your domain to work properly. So when I say tricky, I actually mean it’s impossible without a little bit of local hackery.
This step is where being a developer helps. If editing files in your System32 folder scares you, good. If it doesn’t, it should. Editing anything in there could completely destroy your machine. So do so at your own risk. :)
The way I test my installations after a move, before the domain is pointed, is by editing my local hosts file.
To do this, first find your local hosts file on your machine. It should be (WhateverDrive):\Windows\System32\drivers\etc\hosts
Open that file as an admin and you should see something that looks a little something like this:
You can add your new domain and new server’s IP address to this file and it will send your machine (and only your machine) to that IP address instead of whatever the DNS is telling the world to do.
So for example, if you’re new IP address was 37.259.48.24 and your domain name was google.com, you would add “37.259.48.24 google.com” as one line to the file. Save and reload the page.
Step 7.
Set Up MX Records On New Server
Okay, at this point you might be thinking “didn’t we just do this in step 3?” and the answer is yes. But the reason we are doing this twice is so that we have no downtime. You’ll setup your MX Records on your new server the same way you did on your old one.
If you decided not to get the Google Suite, then you’ll need to create the new email accounts and credentials for those accounts now.
Step 8.
Update Your DNS’s Nameservers
Now it’s time to point the domain! When you update your name servers, what you’re doing is telling the DNS that your website doesn’t live on that host anymore.
This step could take up to 3 days to fully propagate, but during that time there should be no downtime of your website. Because the moment it stops pointing to your old server, it will start pointing to the new one (which you’ve spent the last 7 steps moving your site and email to).
Step 9.
Transfer Domain
At this point, your website is fully live and living its best life on your new hosting server. But your domain is stilled registered at the old hosting location (or somewhere else). If you would like to keep all your website billing in a single location, you’ll need to transfer the domain over as well.
This process can be a bit tricky, but the gist is:
1. Get the EPP code from your current registrar. You’ll need to make sure the domain is unlocked to do this.
2. Buy domain registration at your new registrar.
3. Transfer the domain to the new registrar using that EPP Code.
And that’s all there is to it! Not so bad, right? …Okay, it is pretty bad. Moving hosting is not an easy task no matter what anyone says. If you’re not super comfortable with doing this on your own (and who would blame you?), please don’t hesitate to ask for help. Done wrong, a site transfer could be catastrophic to your business. Done right, it can be the catalyst to a better, faster website.