The Gutenberg post editor is here to stay! This easy-to-use block editor that’s baked into WordPress’s core is an author’s best friend when composing new content for your blog. However, the block editor is a far cry from what you can do in Divi. So how can you use the efficiency boon you get from Gutenberg with the functionality-expanding features you get from Divi? And where does ACF fit into all this?
In this article, I’ll cover exactly how to create a banging new post template for the Gutenberg Editor using the Divi Theme Builder with custom field add-ins powered by ACF.
An Overview Of Our Tools
But before beginning any How-To, we first need to go over our tools!
What Is The Gutenberg Editor?
So what’s the Gutenberg Editor and why do we care? The Gutenberg editor is WordPress’s new post editor tool. The classic editor will only be available via a plugin through December 31, 2021, after which you’ll be expected to use the new tool. To be fair, by that point it would have been out for a full 2 years. We did a breakdown of the Gutenberg editor in a recent blog post.
What Is Divi?
If you’re new to WordPress, you may not have heard of Divi yet. Divi is an extremely popular page building tool today that transcends the basic page builder of the 2010s. Divi gives you the ability to build entire themes in a page builder. By using this feature, we are able to create post templates for individual post types, categories, pages, you name it.
What Is ACF?
Advanced Custom Fields, or ACF, is a powerful WordPress plugin that gives power-users an ability to add additional fields to posts. You can then use these fields to display more content in different ways on posts. If this doesn’t make sense, that’s okay. ACF was created for developers and its incredibly detailed documentation was written for developers.
Why Use Gutenberg Instead of The Divi Builder For Blog Posts?
If you’re familiar with Gutenberg and Divi, you might be asking yourself “why wouldn’t I just use the Divi builder for my posts?” The short answer is because this is more efficient. You can use the Divi builder on every post, and you can even have a really sharp looking design because of it, but ultimately you’re asking a lot of yourself to build a custom looking post each time. I know plenty of blogs that do use the Divi builder on each post. After a while, each of their posts still ends up using mostly the same layout time and time again.
So rather than using the Divi Builder on each post, what seems to be the more efficient way is to create a Theme Builder template for posts. Then if you need something a little more specific, you can use the Divi Builder Block inside of the Gutenberg editor. Or you can even set the Theme Builder to exclude the specific post that you’d like to give a little extra visual care using the Divi Builder.
So in short, this is just easier and it’s going to save you a ton of time down the road to it this way. This is how I write my own blog posts. In fact, many of the screenshots below are coming from my own Theme Builder dashboard.
Step By Step Guide To Create A New Post Template For Gutenberg Using The Divi Theme Builder & Advanced Custom Fields Plugin
Install Divi
Step 1 is to install Divi. If you don’t own Divi yet, you can pick it up here from my affiliate link. I personally recommend the lifetime subscription as that is what I did back in 2012 and it has paid for itself so many times by now. You can also try the page builder for free here.
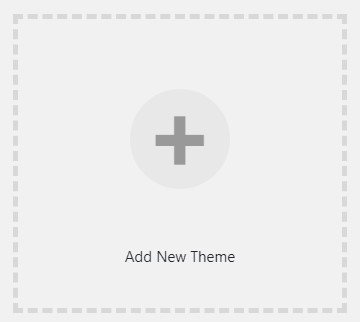
- Once you own a copy of Divi, go to Appearance > Themes in your WordPress Dashboard and click “Add New Theme.”
- This will take you to a page with many free themes to choose from. You don’t want any of those. Click “Upload Theme” at the top.
- A file upload box should have appeared above all those free themes. Click “Choose File” and navigate to your downloads file to upload that Divi.zip file.
- Once that’s installed, you’ll need to activate it.
- At this point, your entire website is now being powered by Divi.
Divi out of the box isn’t anything too impressive visually. It’s the features it brings and the flexibility it gives you that really makes this theme by Elegant Themes shine.
So if you’re not impressed right now by your vanilla Divi theme, that’s okay. You can check out a lot of the free Divi Page Layouts available from Elegant Themes, and import them directly to your site to get at least a good starting point for a website. And if you want something more custom, which you likely do, please reach out to us and we can make that happen!
Design The Template
The next step is to come up with a visual idea of what you want your post templates to look like. If you’re brave, you can skip this step… But to honest, you probably shouldn’t. Having at least a rough idea of what your blog post template is going to look like is going to really make the next steps way easier.
Even if you’re just going to create a rough napkin scratch wireframe, that’s better then going into the next steps blind.
The main areas that you need to remember when creating this are:
- Post Title
- Post Author
- Post Meta (Date, Categories, Tags)
- Featured Image
- Post Content
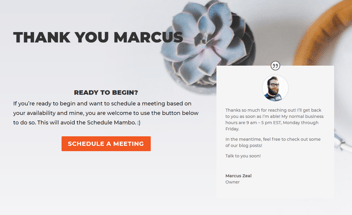
- Any Custom Content (Quotes, TLDR Section, Featured Image Attribution, Etc)
- Comments
Install ACF Plugin
After you’ve created your design, if you thought of any custom fields that you want in your design then you will need ACF to make those happen. If, after making your design you realize you have no need for any custom fields then skip to “Create The Divi Post Template” step below.
Which makes step 3 to install the ACF plugin. ACF is free. They offer a premium version that gives you a lot more functionality, but if you’re not doing anything to complex, the free version is enough for this tutorial. You can get ACF from the WordPress plugin repo here.
Full disclosure, they don’t currently (at the time of writing this article) have an affiliate program. So I’m giving this recommendation on ACF without any chance of getting financial gain from them. However, they are incredible and if they ever do add an affiliate program, I’ll be sure to come back and update these links. ;)
Create Custom Fields
Now that ACF is installed, you need to configure it!
- From your dashboard, go to Custom Fields > Field Groups.
- Click Add New
- On this page, you’re going to see a lot of information. The settings you care about are “Title”, “Fields”, and “Location.”
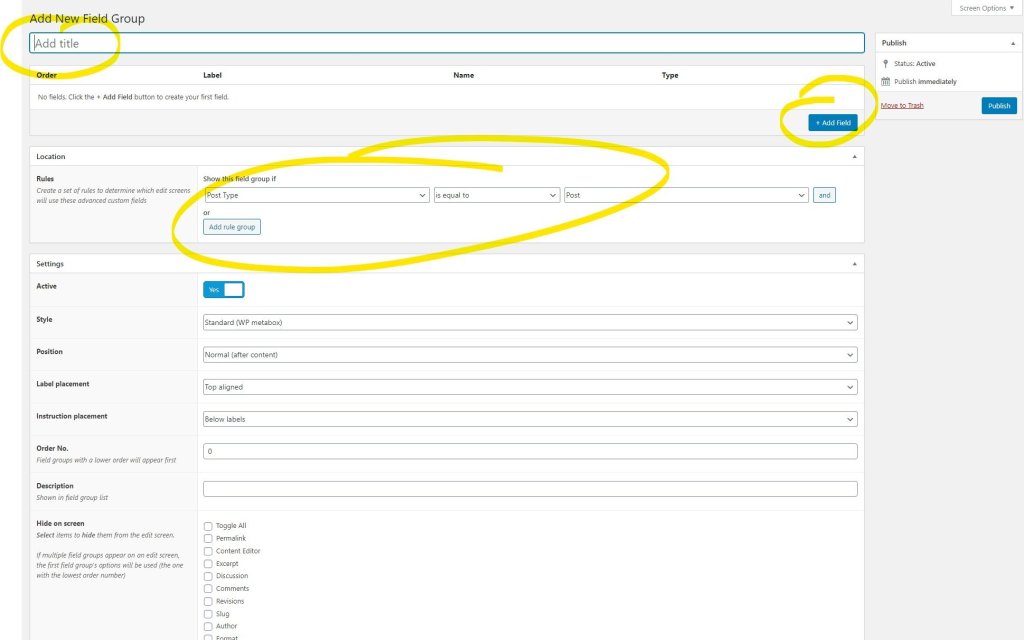
- Add a Title to this field group. Something like “Blog Post Extras” would work fine.
- Make Sure the Location rules are set to Post Type – Is Equal To – Post. This is how you would use ACF to add fields to other locations in a WordPress hierarchy.
- Press Add Field (the blue button towards the middle – highlighted above on the right). This will add a bunch of new options for you to fill in.
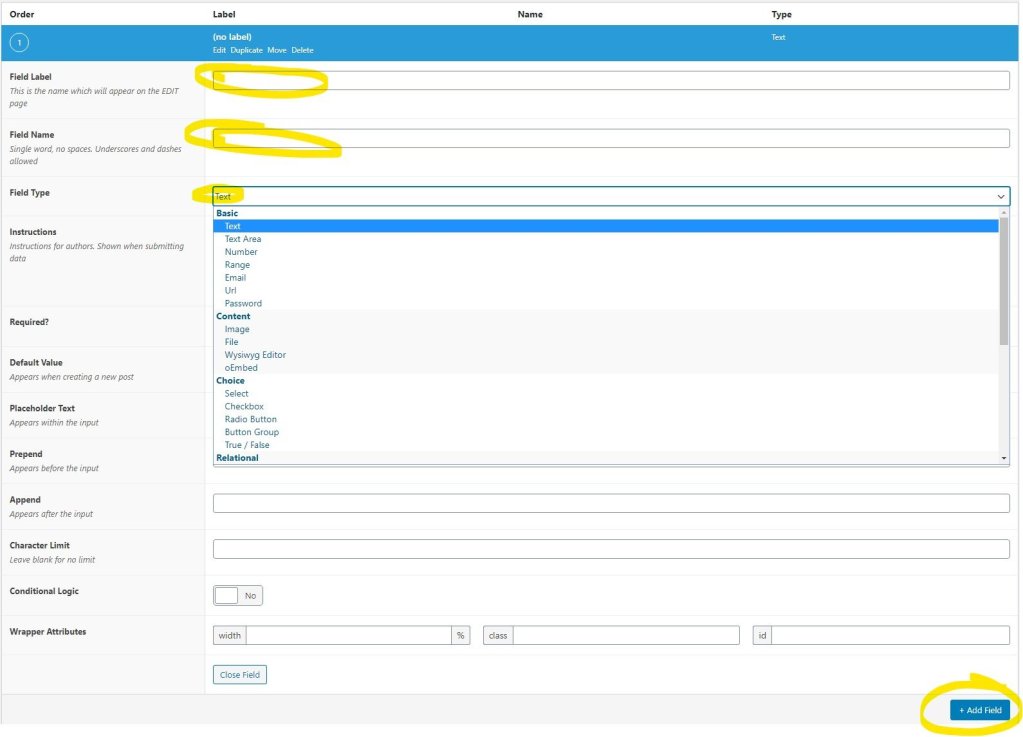
- For each custom field, you want to add, be sure to label it and name it. These can be the same thing, but the name cannot have spaces. In fact, the name should auto-populate with the label converted correctly.
- Further down in these options you’ll see a Field Type dropdown. If you are just adding simple text to the page, the Text or Text Area field types will work great. The Text field is for a single line of text, whereas the Text Area field is for paragraph(s).
- You can fill in as much or as little of the remaining options as you like.
- If you would like to add an additional field, press the blue button on the bottom right to add additional fields.
- Once you have finished adding all your fields and configuring them as you see fit, press Publish on the top right of the screen.
Create The Divi Post Template
By this point in the tutorial, you should have a good idea of what you want the posts to look like, and all the custom fields created to make that vision a reality. Now it’s time to dig into the Divi Theme builder to create your custom post template!
- From your dashboard navigate to Divi > Theme Builder
- The Divi Theme Builder is an incredibly powerful tool. You can use it as much or as little as you like within Divi. But from here, we’re going to create a new template.
- Click Add New Template
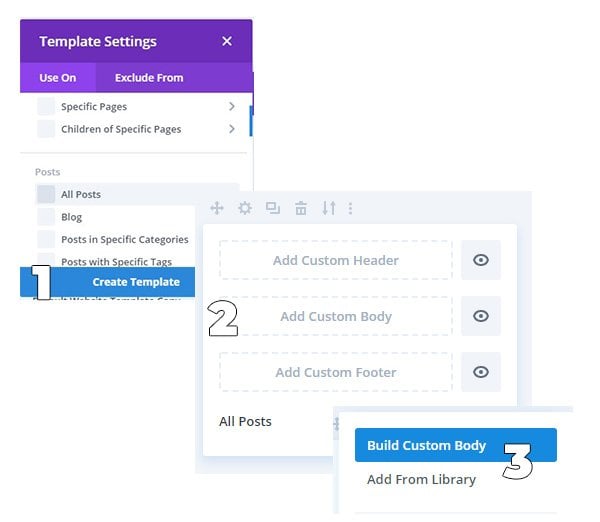
- A pop-up will open with a lot of settings. Look for Posts > All posts. Click that checkbox and press Create Template.
- If you don’t want to use the Theme Builder for your Header and Footer, then click the garbage can icon to remove those. It will default to the theme’s header and footer if a custom one is not designated.
- Click Add Custom Body
- In the pop-up, click Build Custom Body
- Our familiar Divi Theme Builder should open up now. If it doesn’t, click the pencil icon in the gray Custom Body module on the Theme Builder.
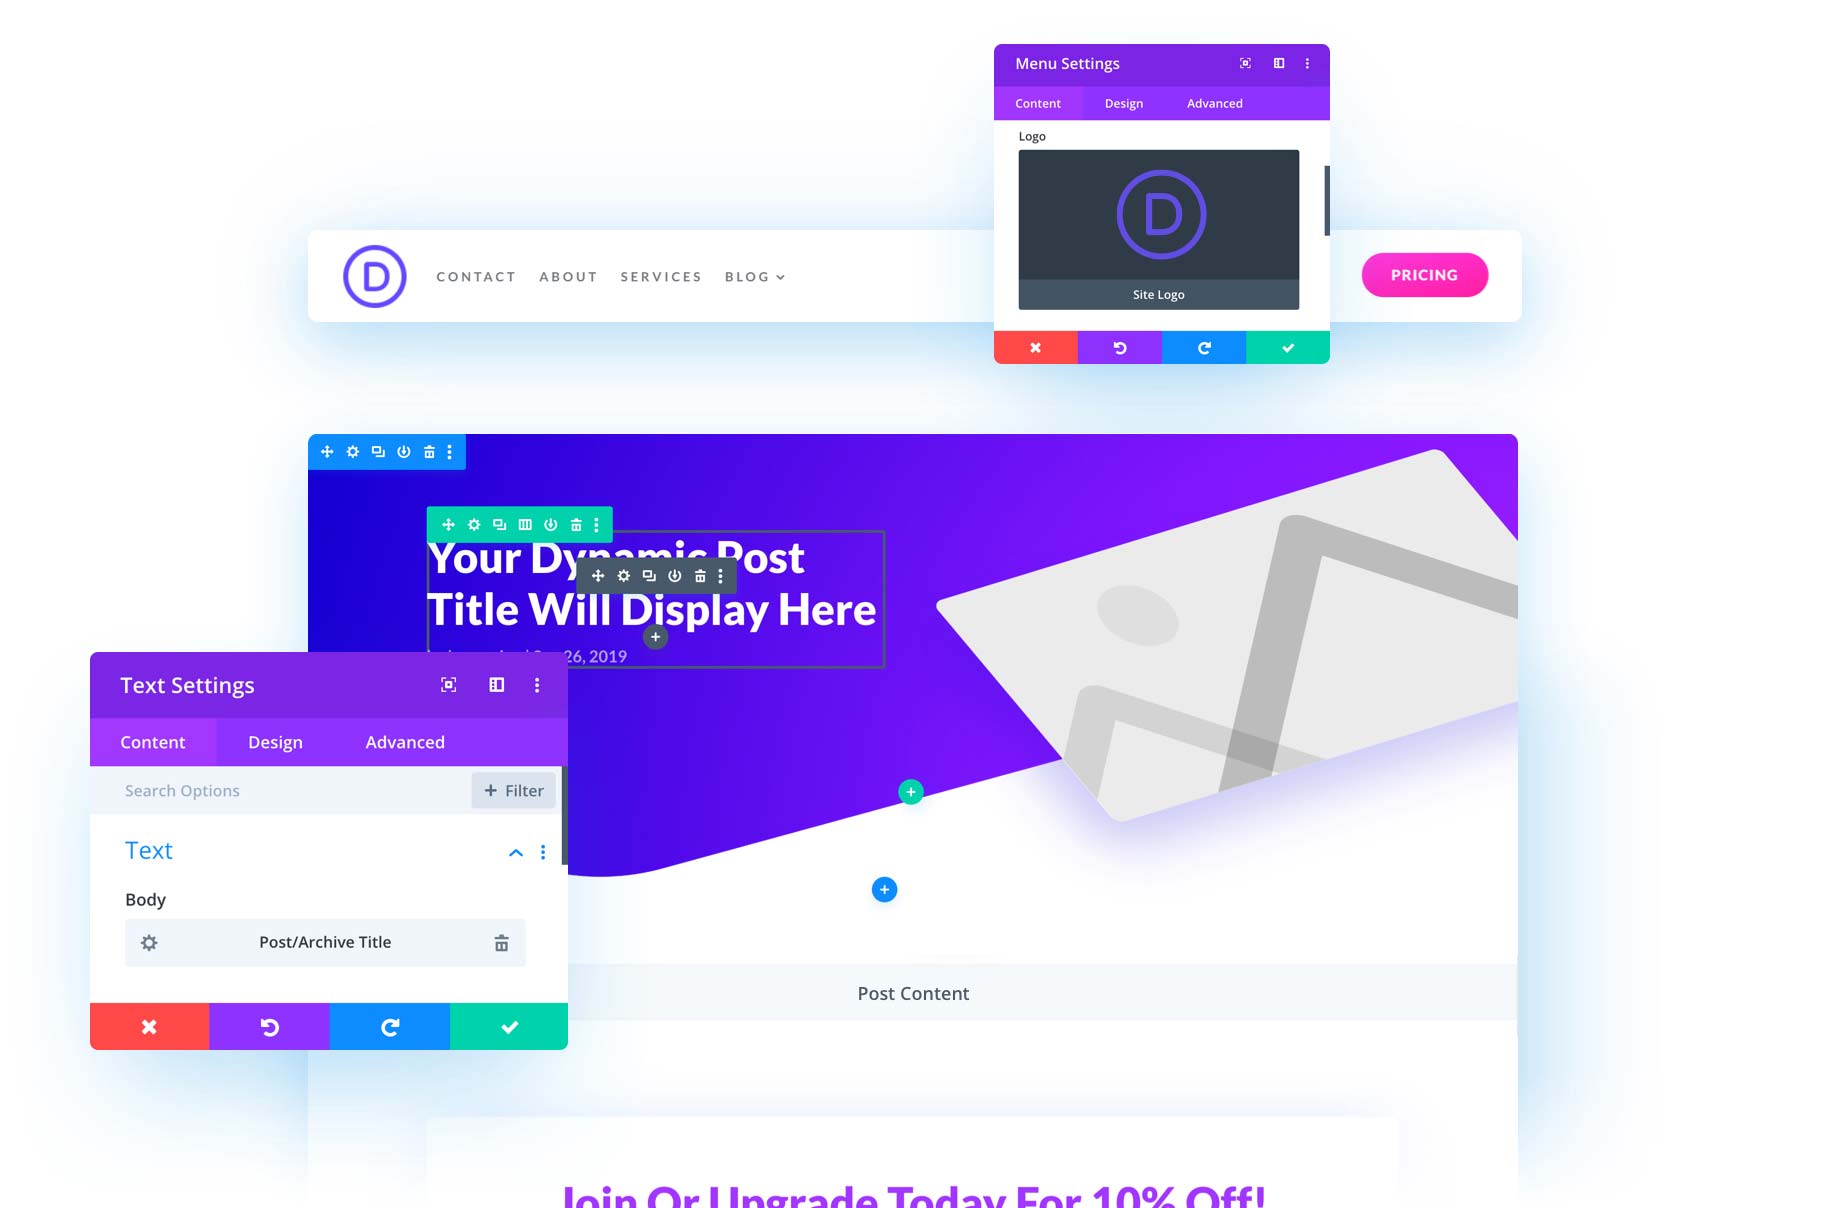
- Inside the Divi Builder, you have the same options you would expect, but rather than filling in static content we’re going to fill in dynamic content! This way your posts will have the content auto-populate dynamically based on the settings you fill in when writing the post.
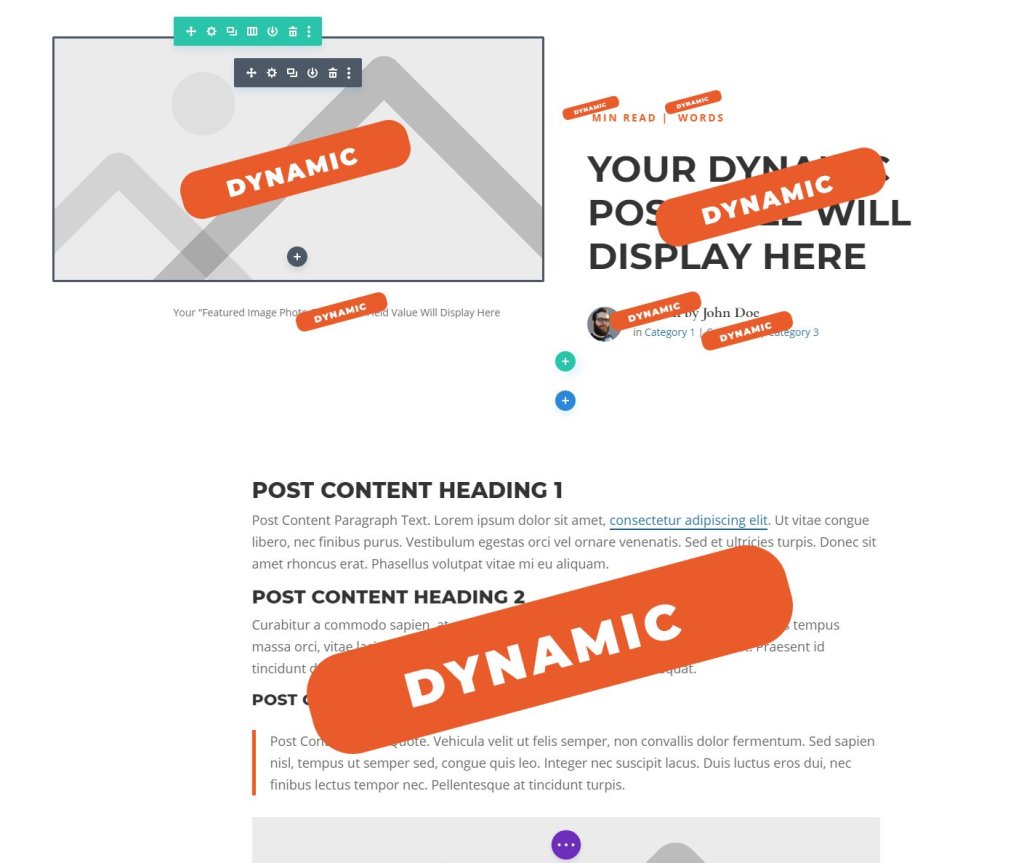
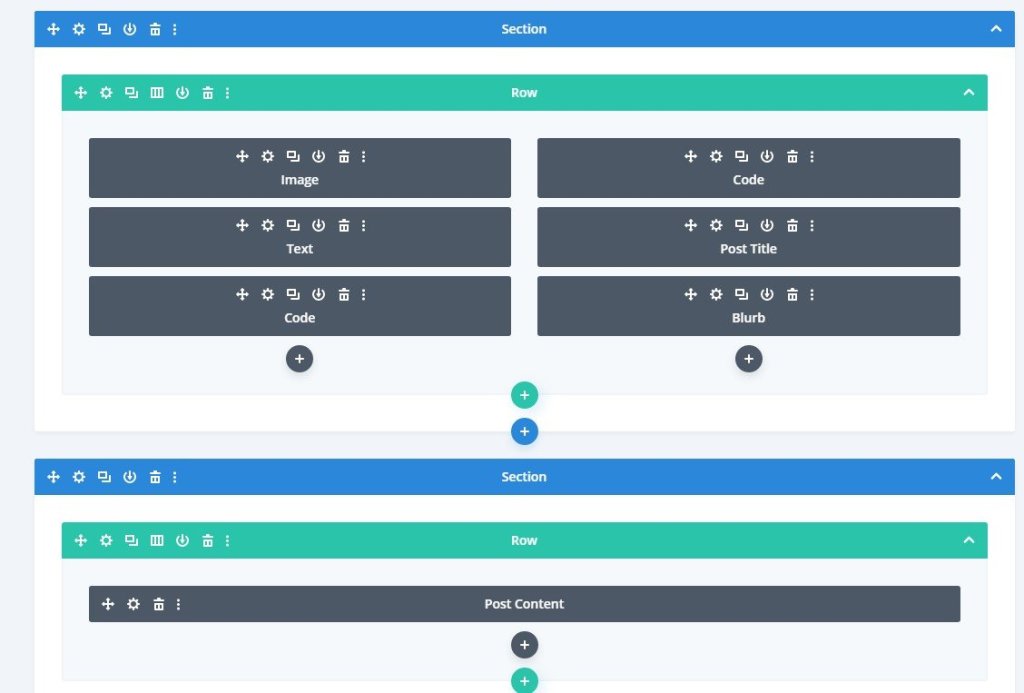
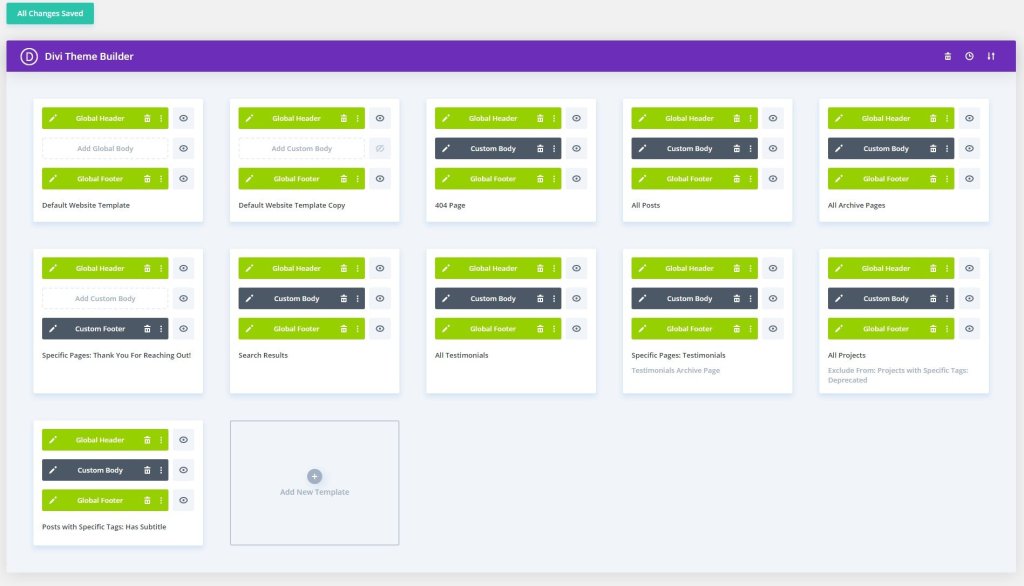
- So, the first thing you’ll need to do here is layout all the content blocks that you want based on your design. Above is a screenshot of my posts’ theme builder currently looks like. You’ll notice I have a few Code blocks in there, those house different custom shortcodes I made for my theme. Beyond that, you have the basic image modules, text modules, and post content module.
Assign Custom Fields In Post Template
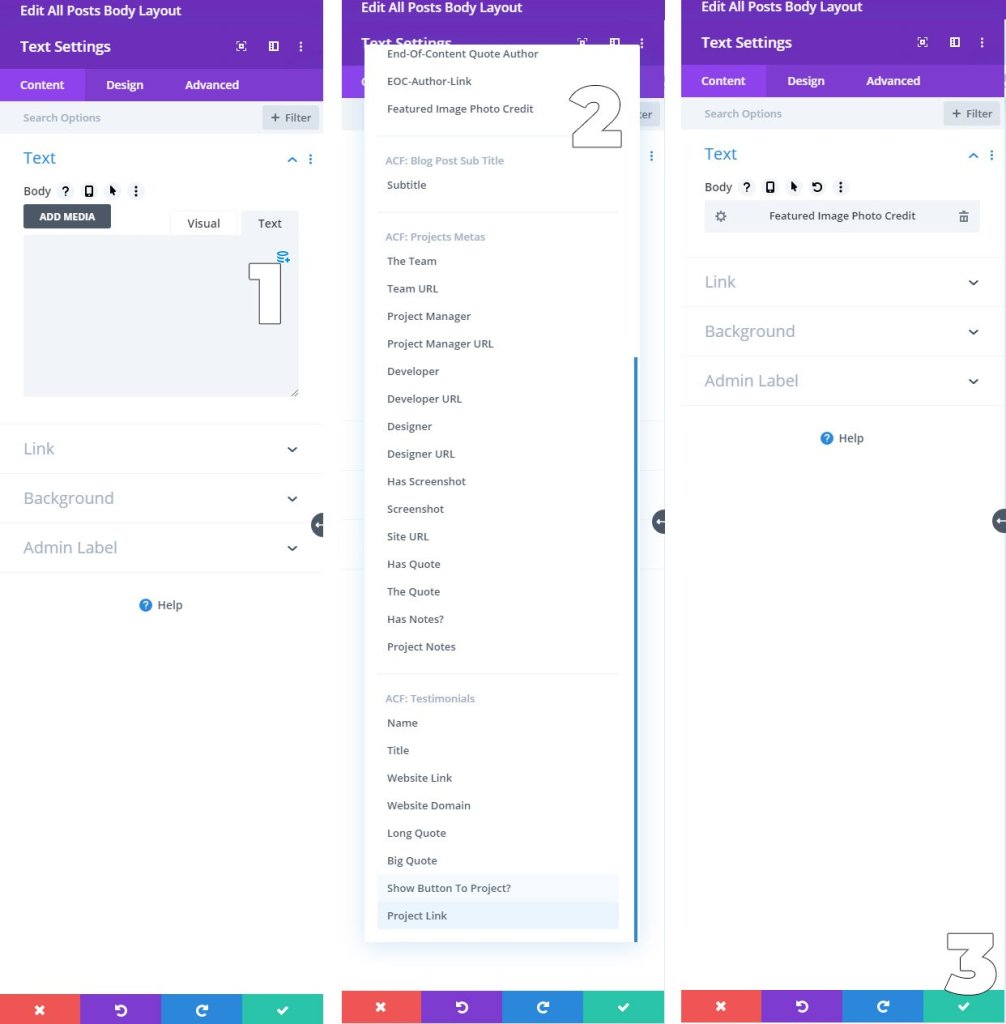
- To add conditional logic to any field, look for the Database+ looking icon on the top right of a form field. The screenshot above shows what I mean. Click that.
- A new scroll window will pop up that lets you choose from some conditional logic. You can choose things like Page Title, Post Date, Author, etc. You can also choose ACF fields if you scroll down further. Here is a list of all the ACF fields I have on my website. As you can see, I use ACF for my Projects and Testimonials as well as my Blog Posts.
- Once you’ve chosen from that list, click the green checkbox as you normally would. Of course, if you want to style these you can do that as well from this module. And if you need to set things like HTML tags, you can do that by pressing the gear icon and adding them in the Before and After sections.

Test It!
- It’s time to test it! By this point, you should have your page designed out using the Divi Theme Builder, and content assigned dynamically using the appropriate modules. The only thing left to do is a test to make sure it all works!
- Press save in the Page Builder, then “save all changes” in the Theme Builder.
- Go create a test post if you don’t have any posts yet. Be sure to fill in your custom fields below the Gutenberg block editor.
- Then go check it out on the front end by either publishing the post, or previewing it.
Common Oppsies
Missing content? Double-check that you have the correct dynamic content connected in the Divi Theme Builder. Sometimes the ACF fields don’t populate in the preview. They always seem to work for me upon publishing (and scheduling, but the preview is hit or miss.
It’s not working at all on your theme? Make sure that Divi is installed and that your child theme, if you have one, isn’t overwriting the single.php or single-post.php files. Those would overwrite the Theme Builder settings.
You don’t see your ACF fields as options? Double-check that you created them and saved them correctly. If this doesn’t work, double-check that you have the most recent version of both Divi and ACF installed.
Still not working? Reach out to Divi or ACF’s customer support for more help. :)
Call in the calvary!
If after reading this you still don’t feel like you can do this yourself, that is totally understandable. This is a pretty advanced topic and to do this yourself may just not be time-efficient for your business. If that’s the case, feel free to reach out to me and Zealous Sites! This is what we do for a living and we’re happy to help!